Client Project (Virtual Cities) DM2130
This page will now detail the work that I complete for the group client project which involved joining a team and helping to develop a creating of medieval Winchester. This involved working with a team called Virtual Cities. As a group we have been tasked with designing models that can be used to create 3d assets for this project. I was made team leader of this project and I was very happy with the progress of the work that I completed. As a group we had set up a discord to keep up to date with deadlines and presentations and we were able to offer support to each other when needed. This was our main way of communicating within the group and we were able to contact our client via teams which was important to gain support if we were unsure on tasks. Within this project I will discuss: Modelling process, Research, feedback and responses and I will then finally conclude the project will my final thoughts of the project.
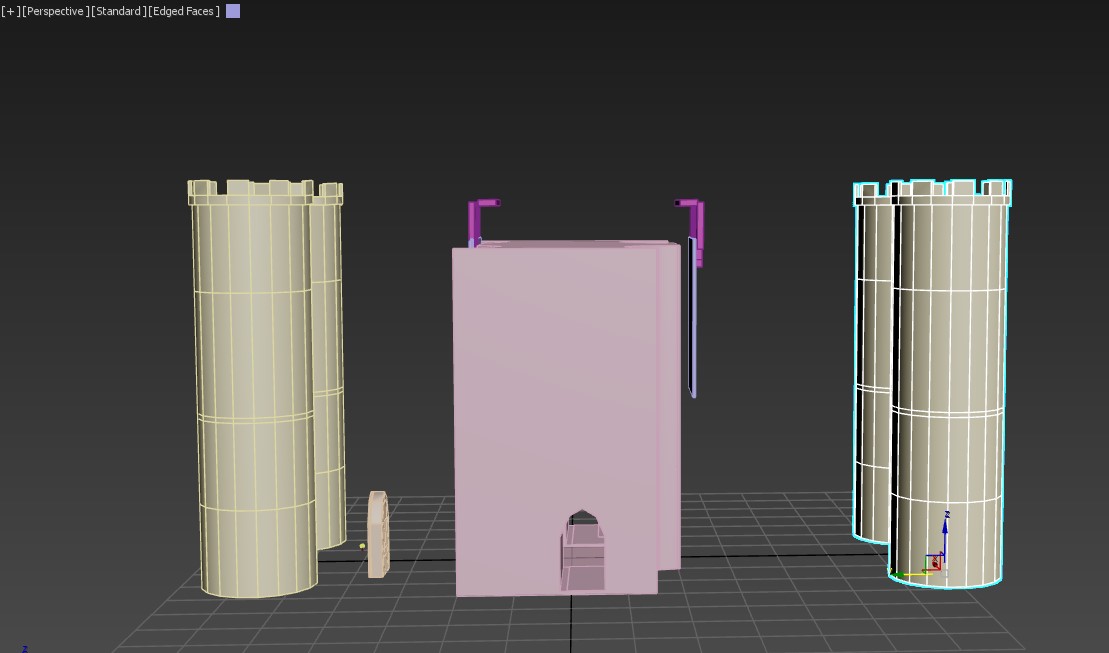
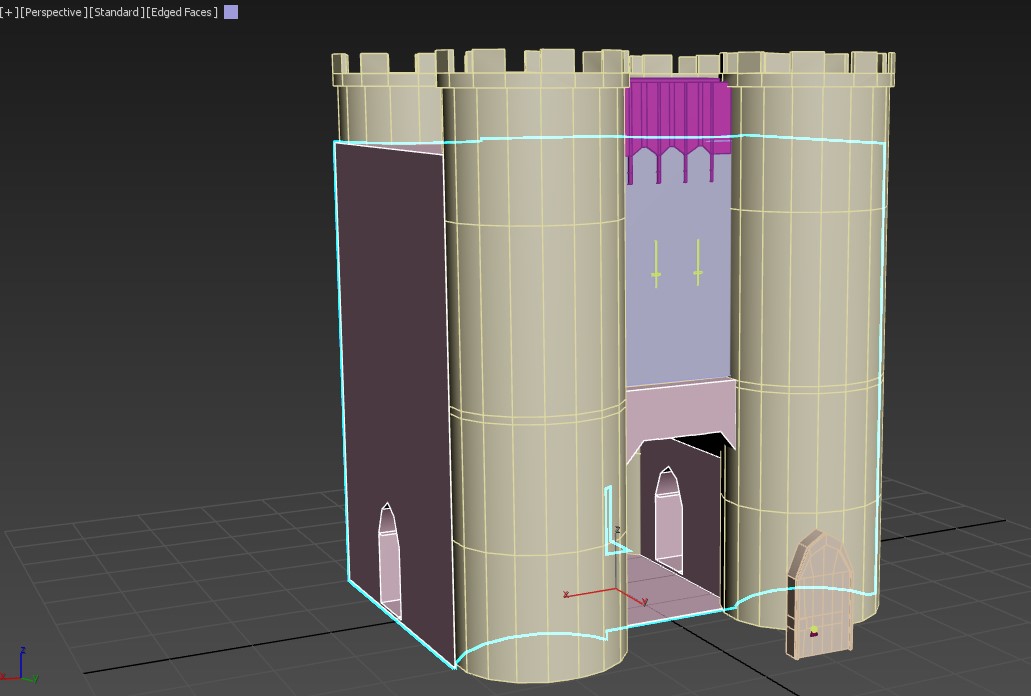
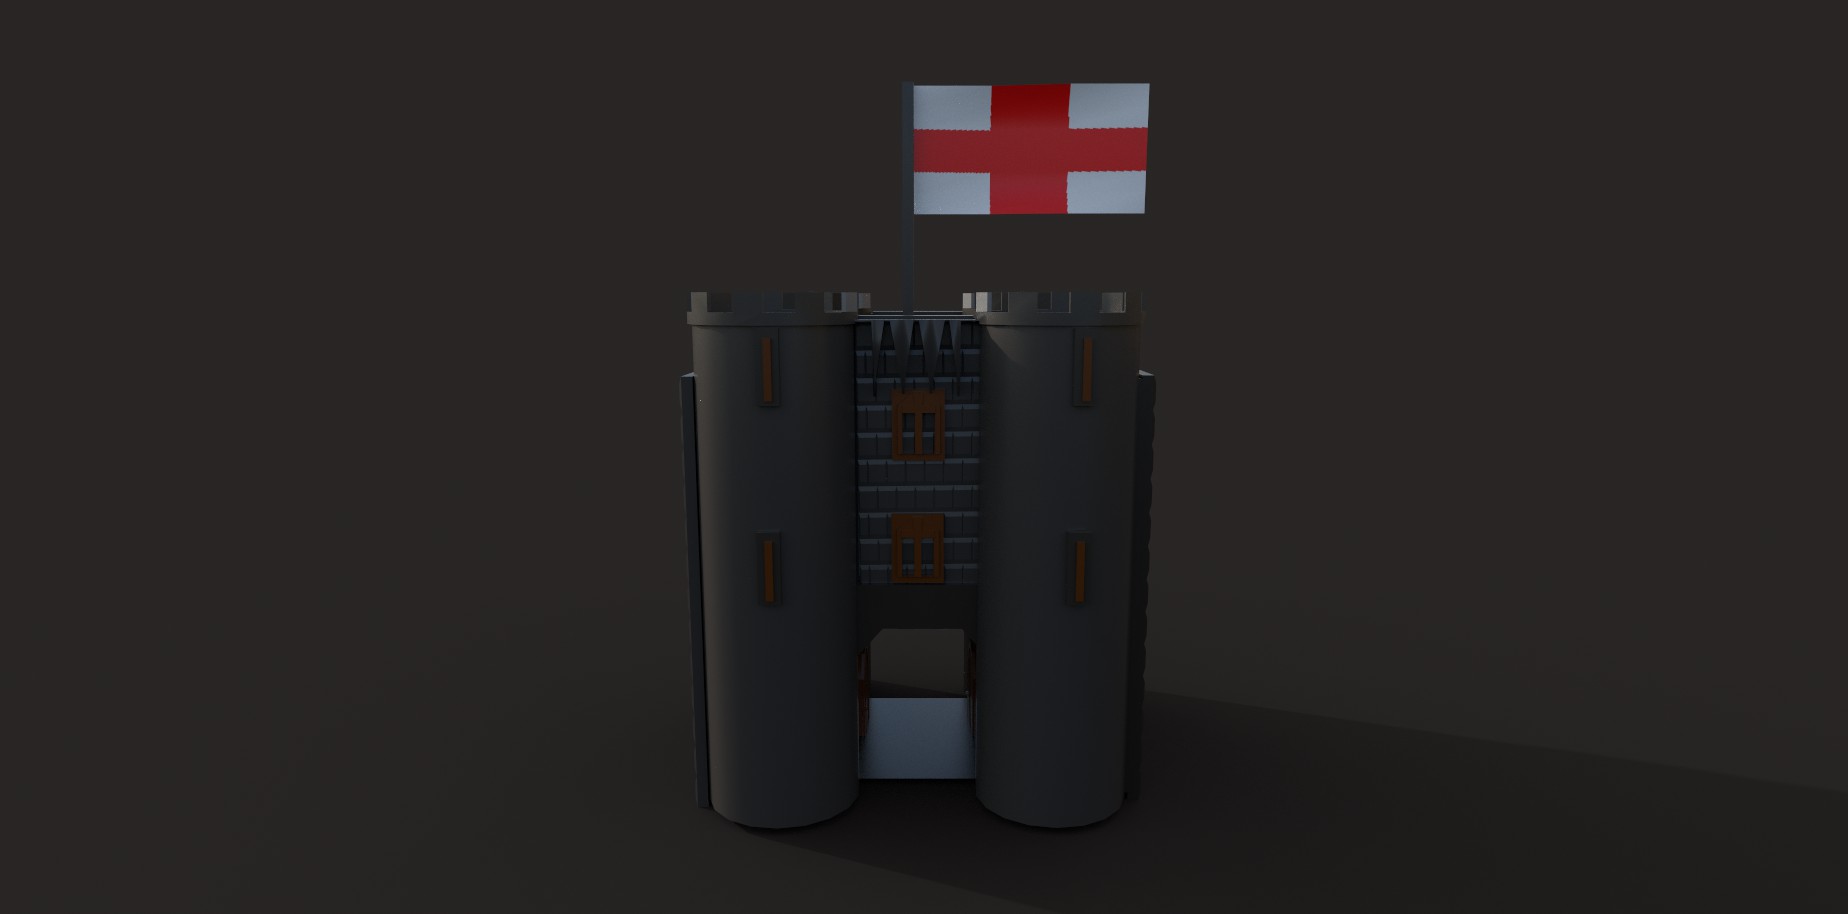
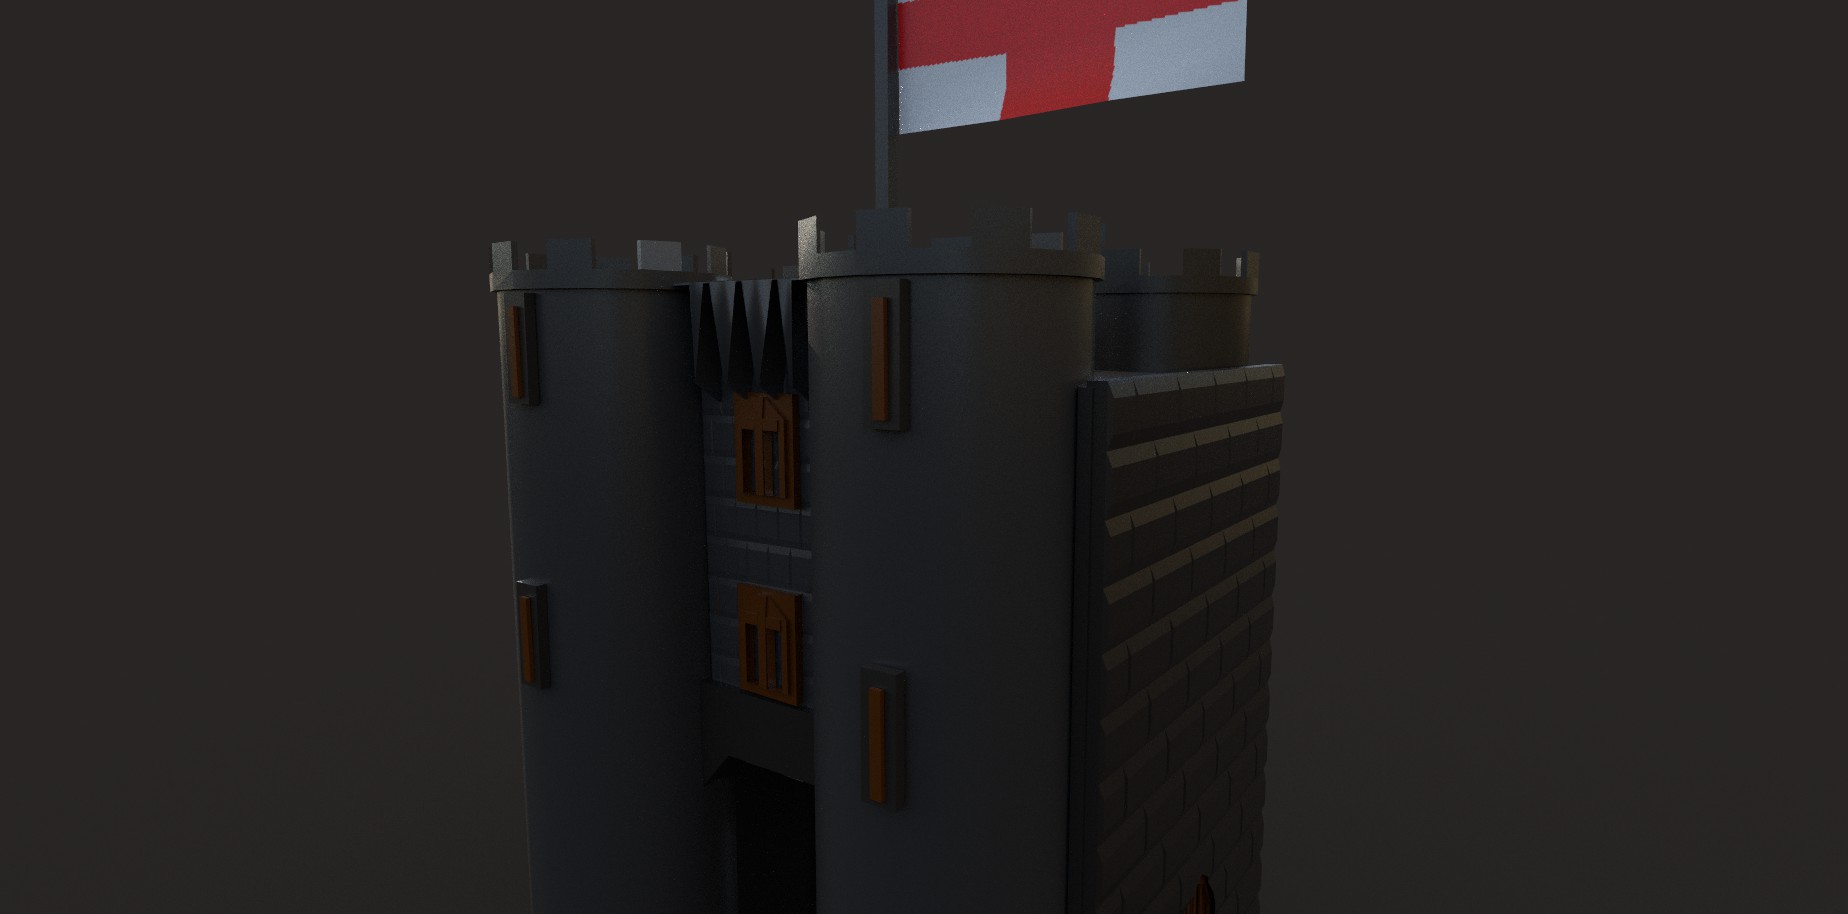
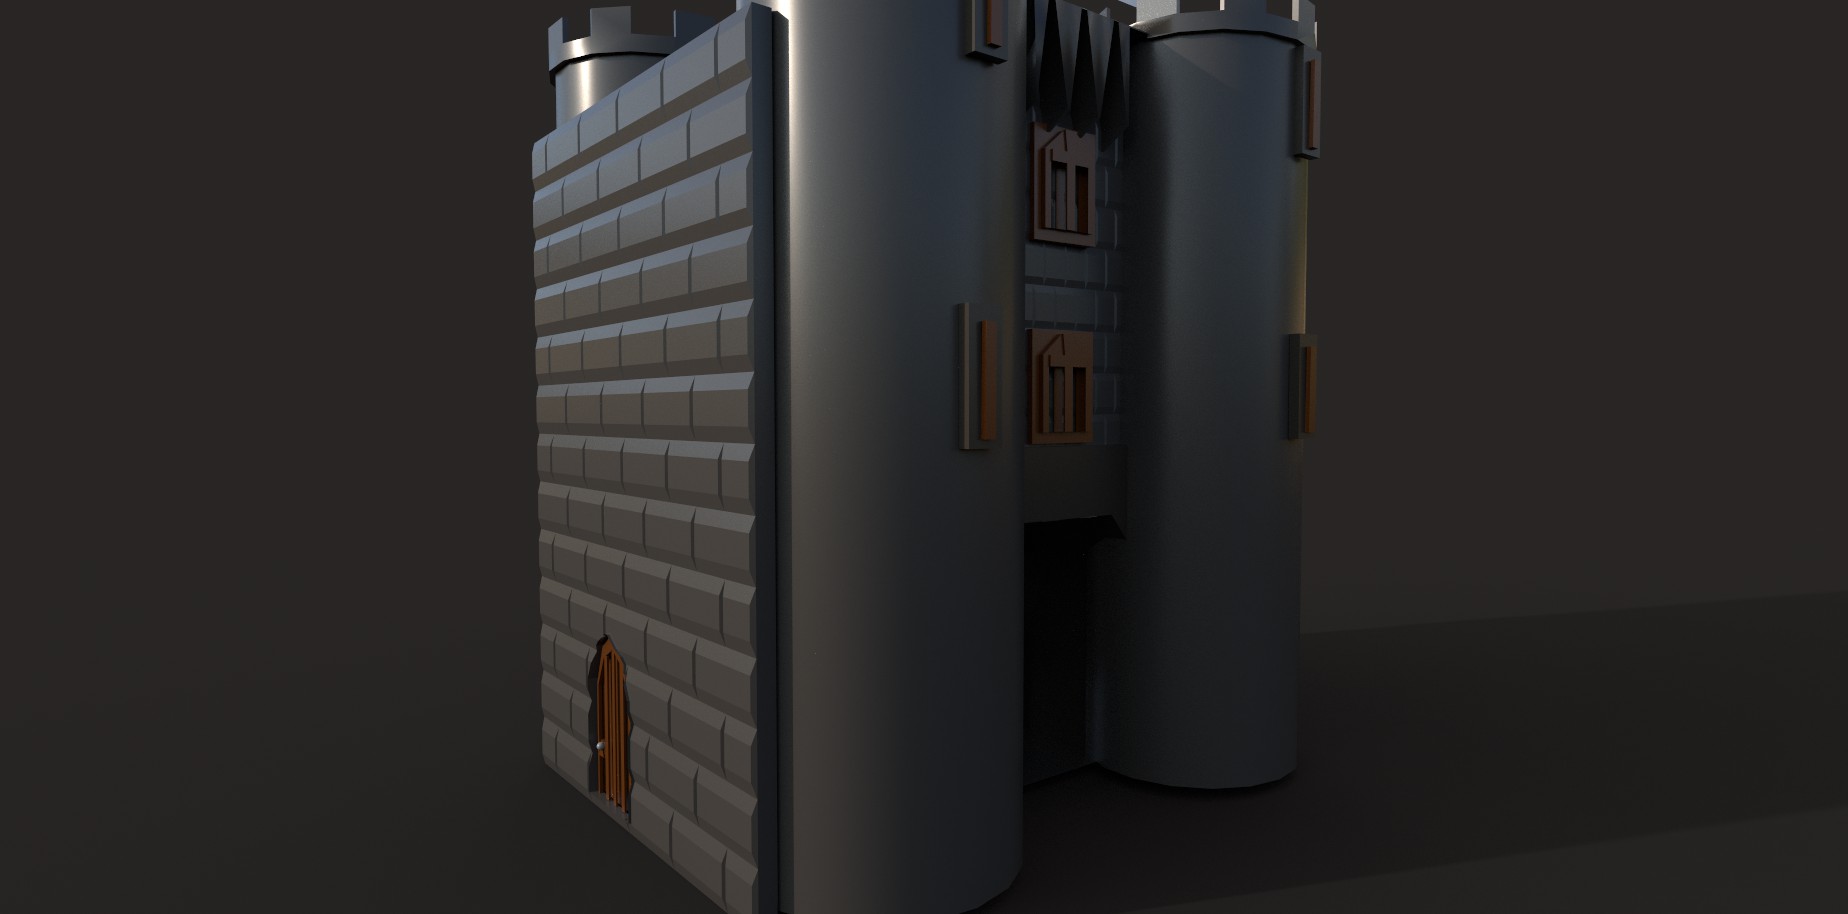
East Gate Modelling Process
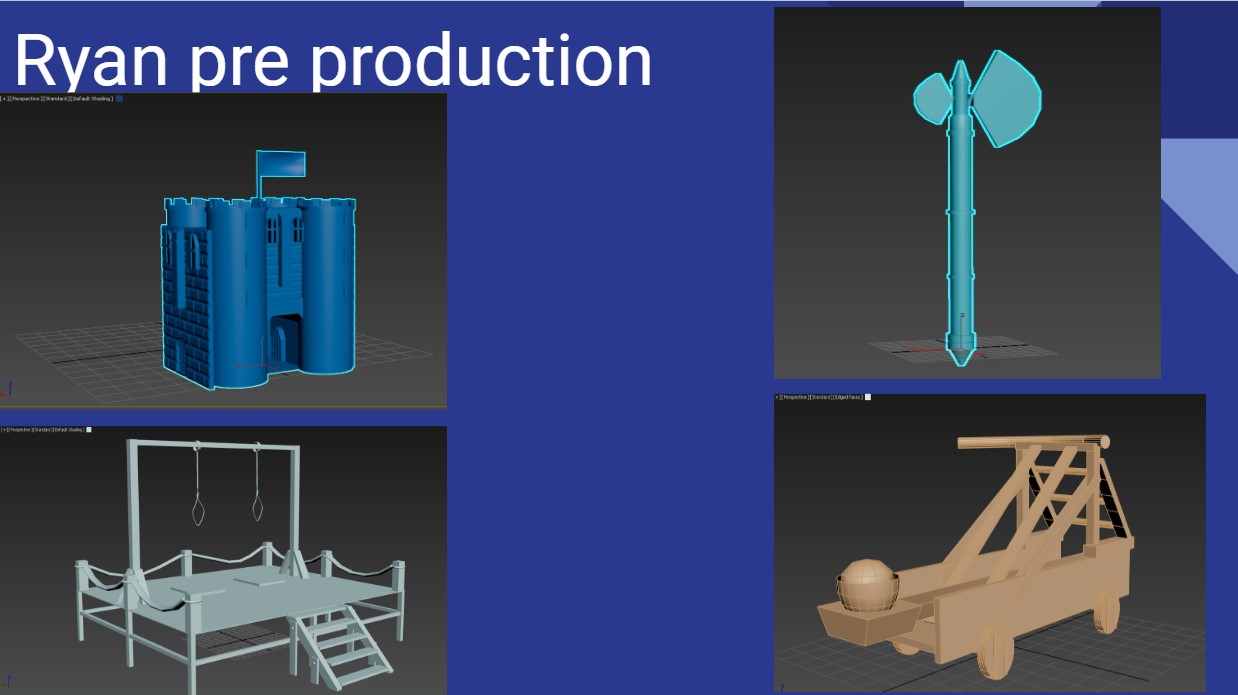
The first model was creating the east gate, today it no longer exists which is why I conducted research and also have showed the stages in the development of the model. I began with understanding the models different depictions and styles and then putting the model together using different reference images to outline my plans. I then began the modelling process which involved researching new techniques like the Pro-Boolean tool. This specific tool is designed to cut a shape into another shape, I used this tool to create the gate/entrance. During my development process I felt the original wall that I was referencing was not as interesting and I wanted to keep the orgional design but by adding some other changes like the towers which were not on the original east gate. In the presentation I began working on the design but I wanted to make some changes and the feedback on this was mainly to keep to the original design but also to include minor changes the minor changes were included but I'd made sure that it is realistic.
Stage 1
Stage 2
Stage 3
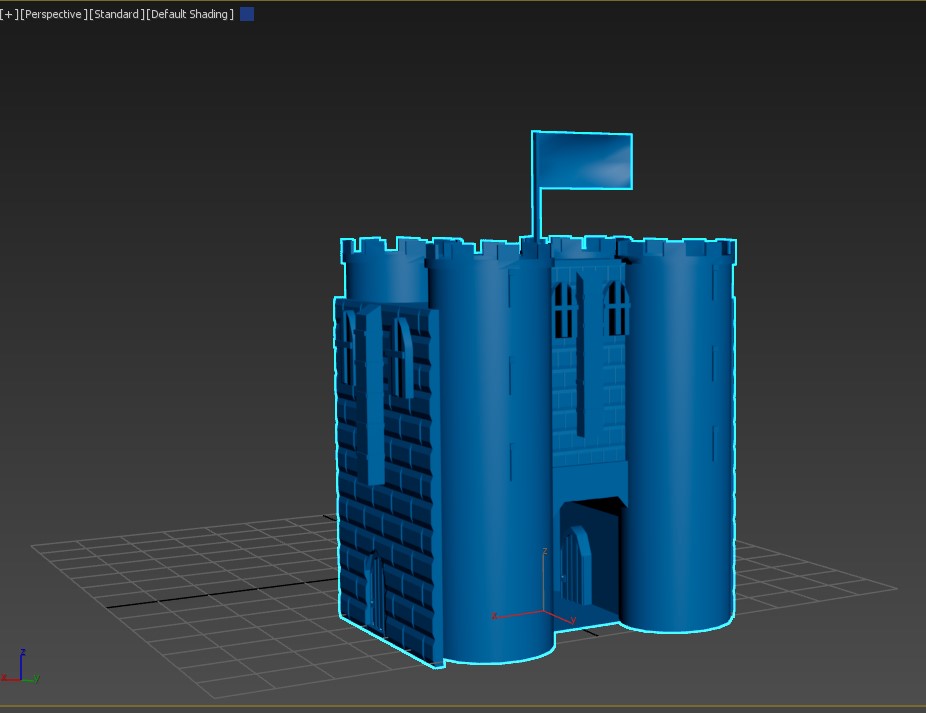
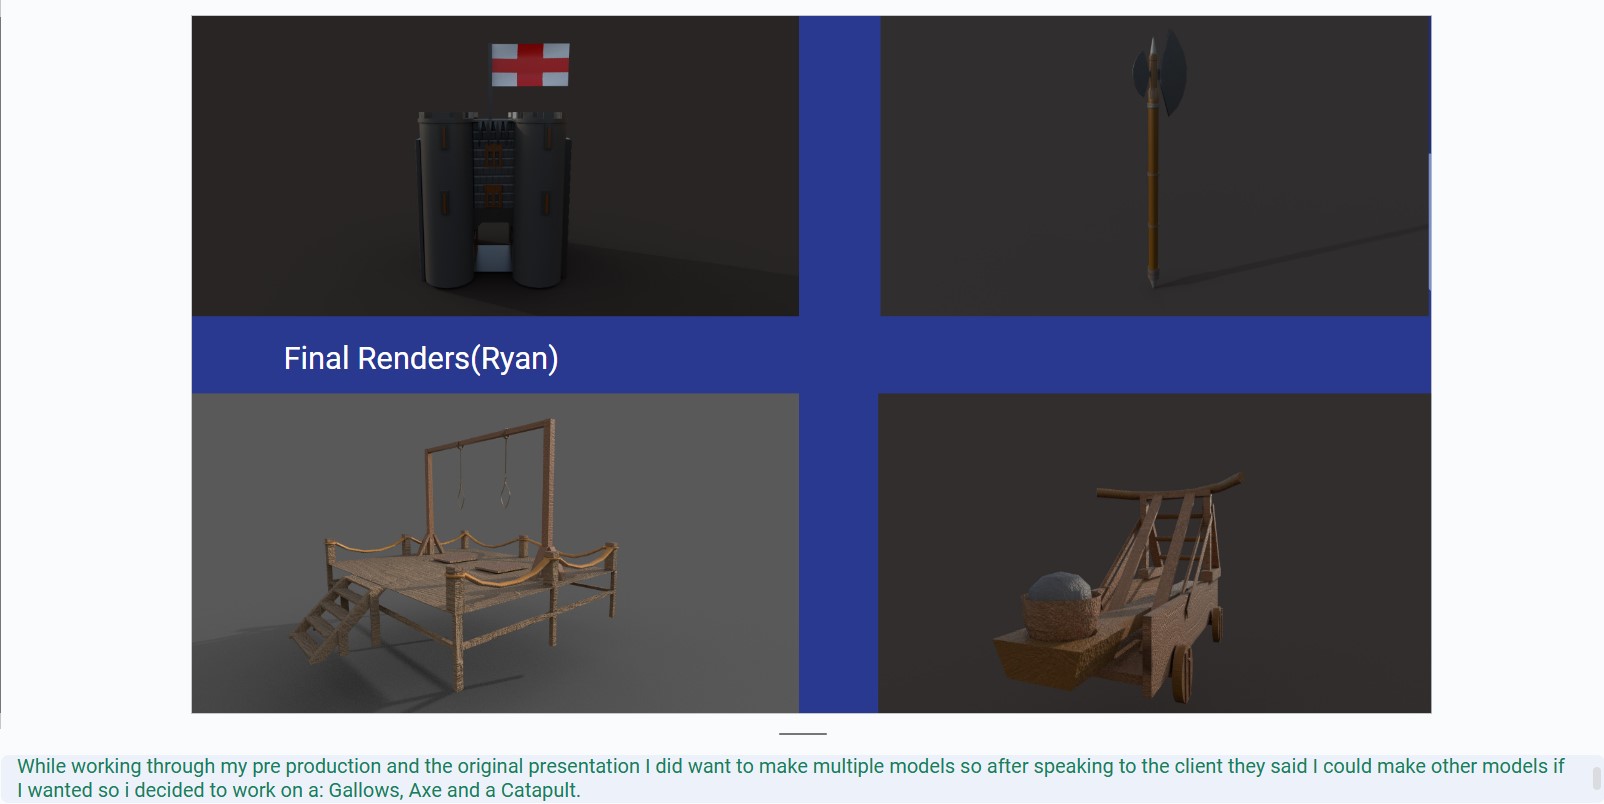
Below are my In-progress shots of the texturing process. The first image you see is from an early texturing process and below that is my final renders, the model is slightly different as I wanted to give windows more substance and then allow them to blend in with the stone marterial. I also improved the flag which was had some issues with the object not rendering and this led me to load up a old version to base the asset off. I believe I made the right changes to improve this model and make sure it was ready for the client.
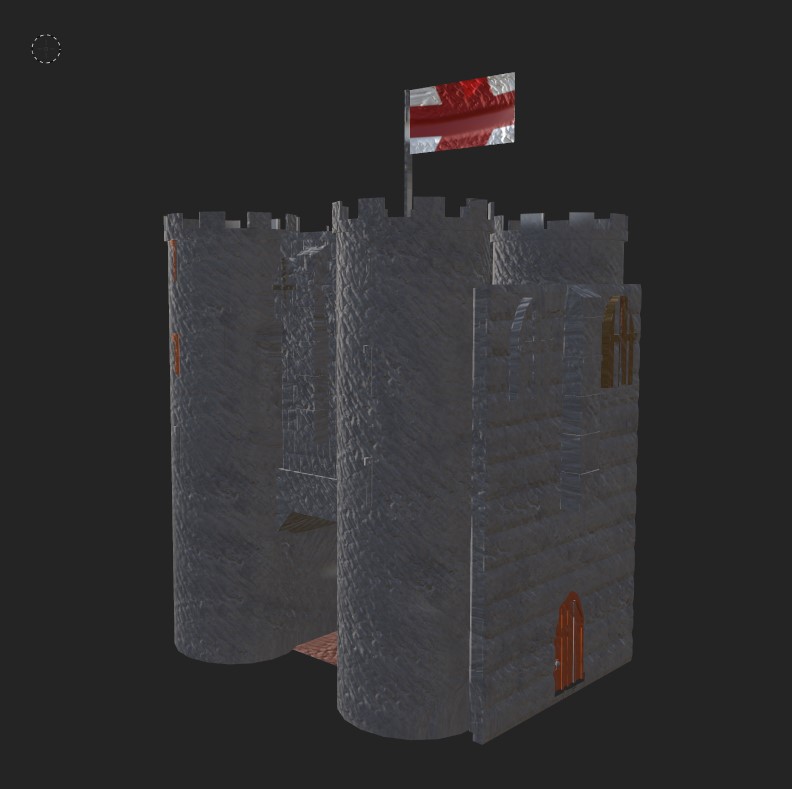
East Gate (Final Renders)

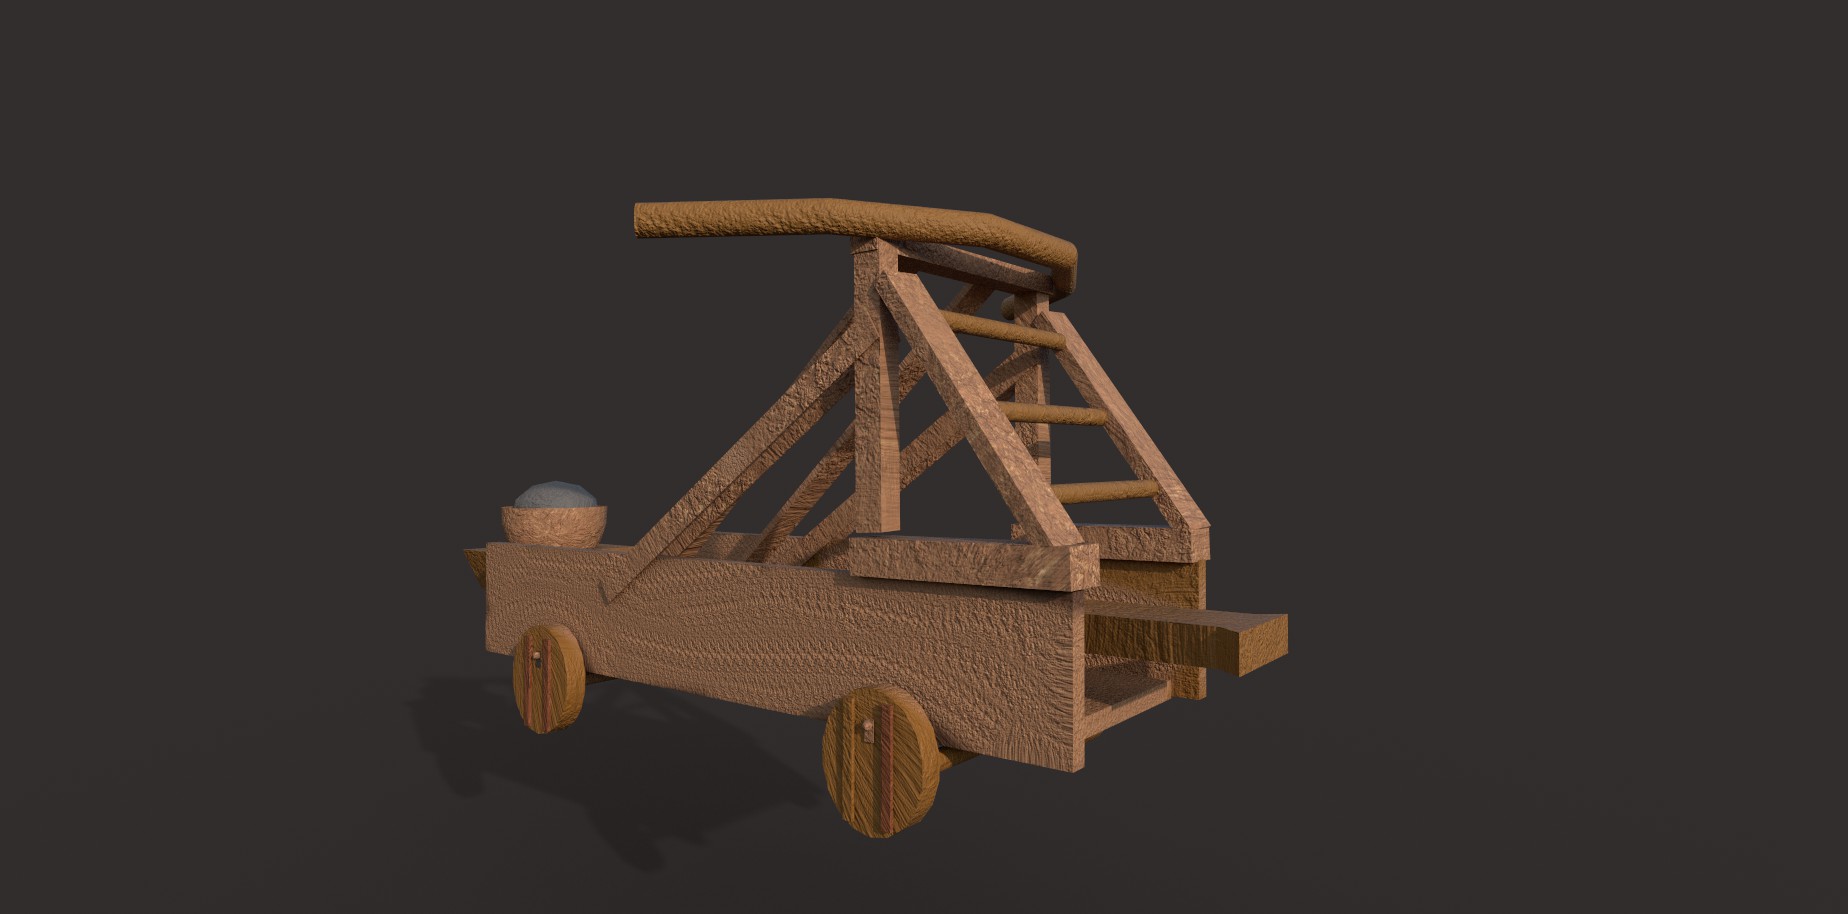
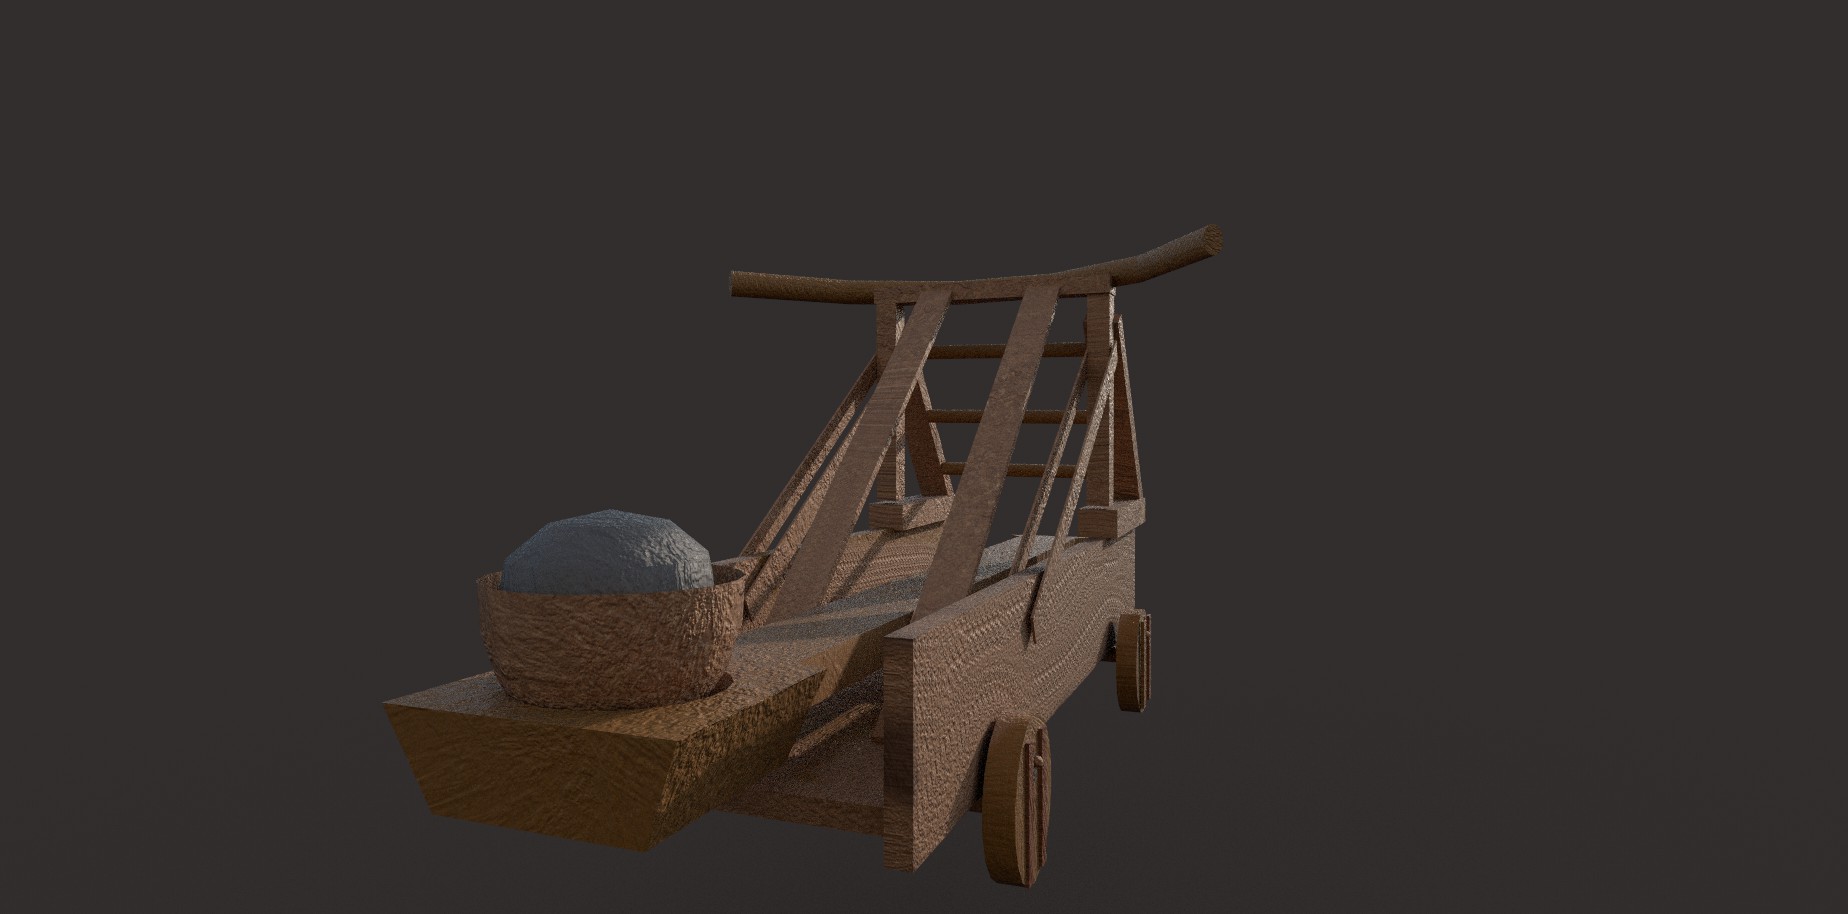
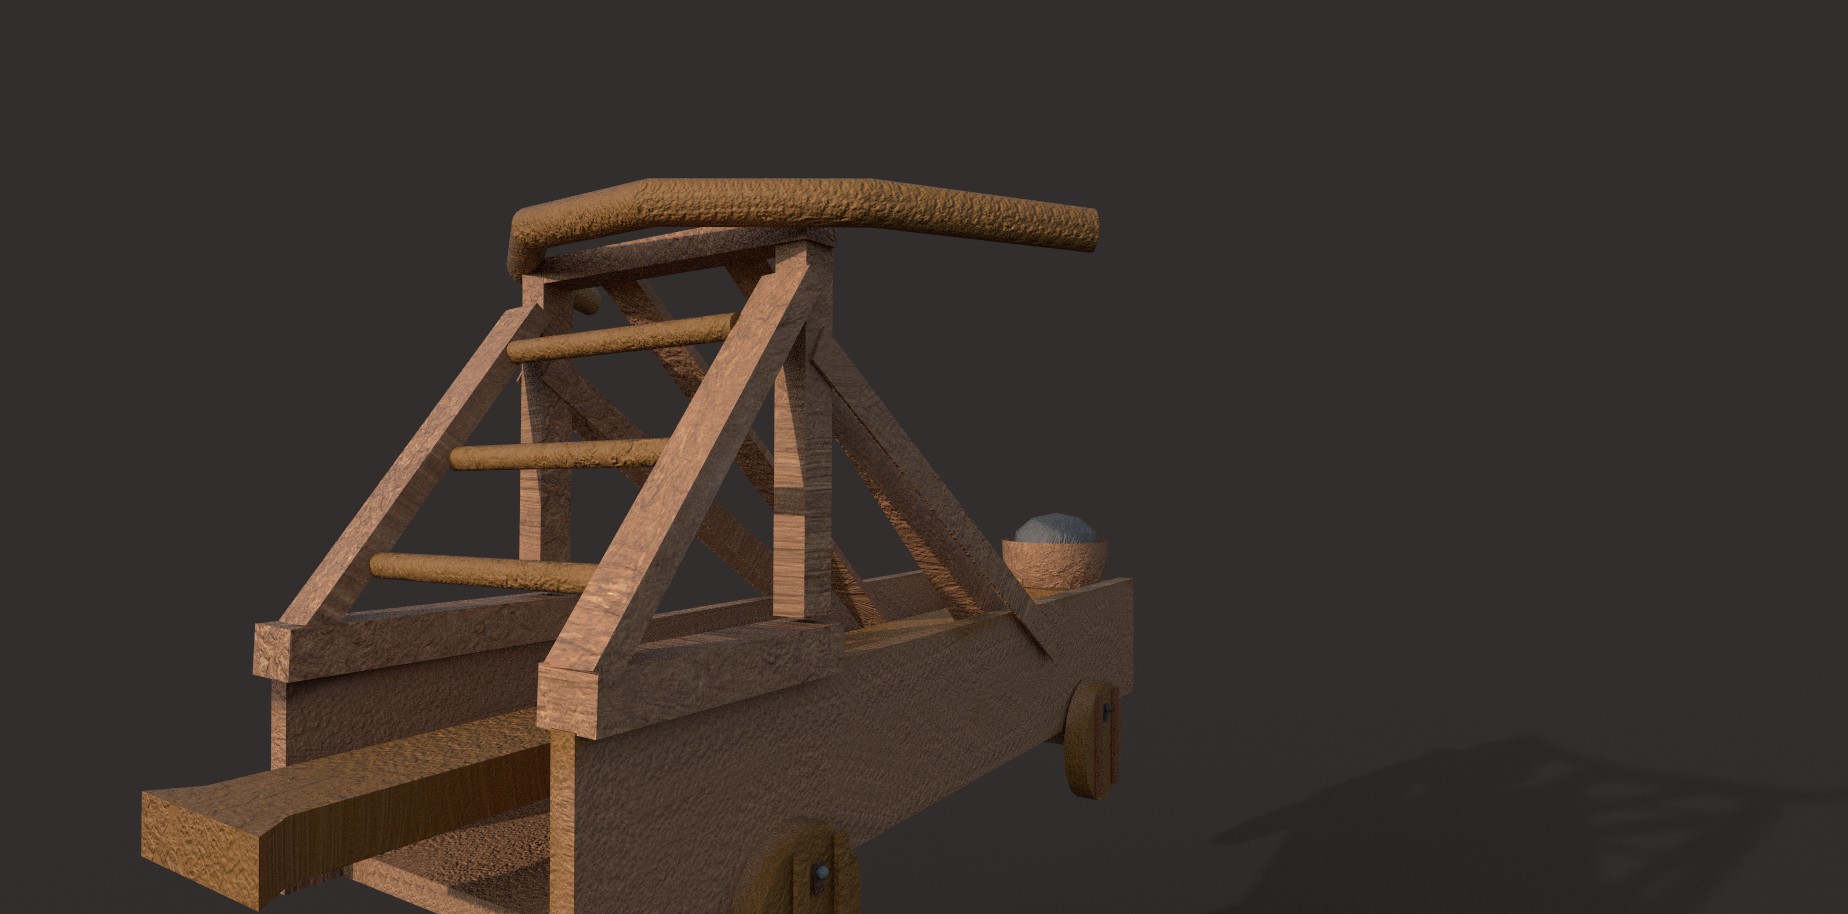
Catapult (Final Renders)
For my second asset I decided on a catapult. This model was designed to be used within the castle or even around some of the models already in the scene. During the development of this model I wanted to use simple tools and shapes as based on the reference image I found it had mostly cubes and squares. The main tools I used were mainly the pro-boolean tool and the bend tool which was used for the upper cylinder and then to create the hole in the catapult its self. I did not capture any inprogress shots as I forgot during the process so I was only able to capture images of the model when it got textured.
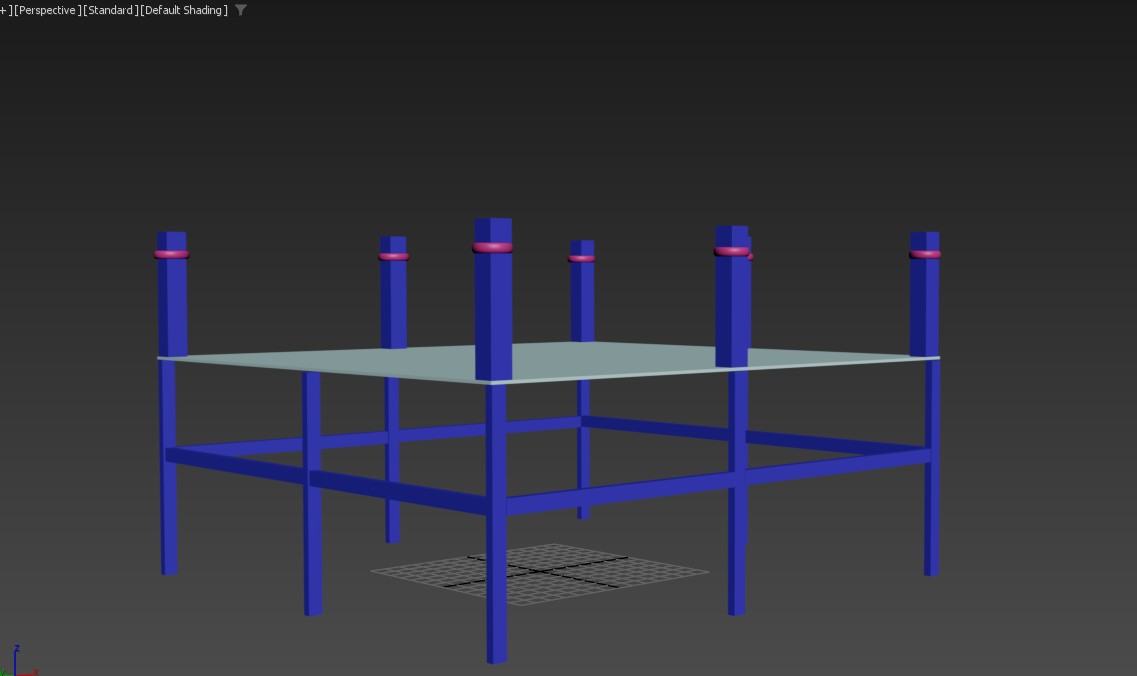
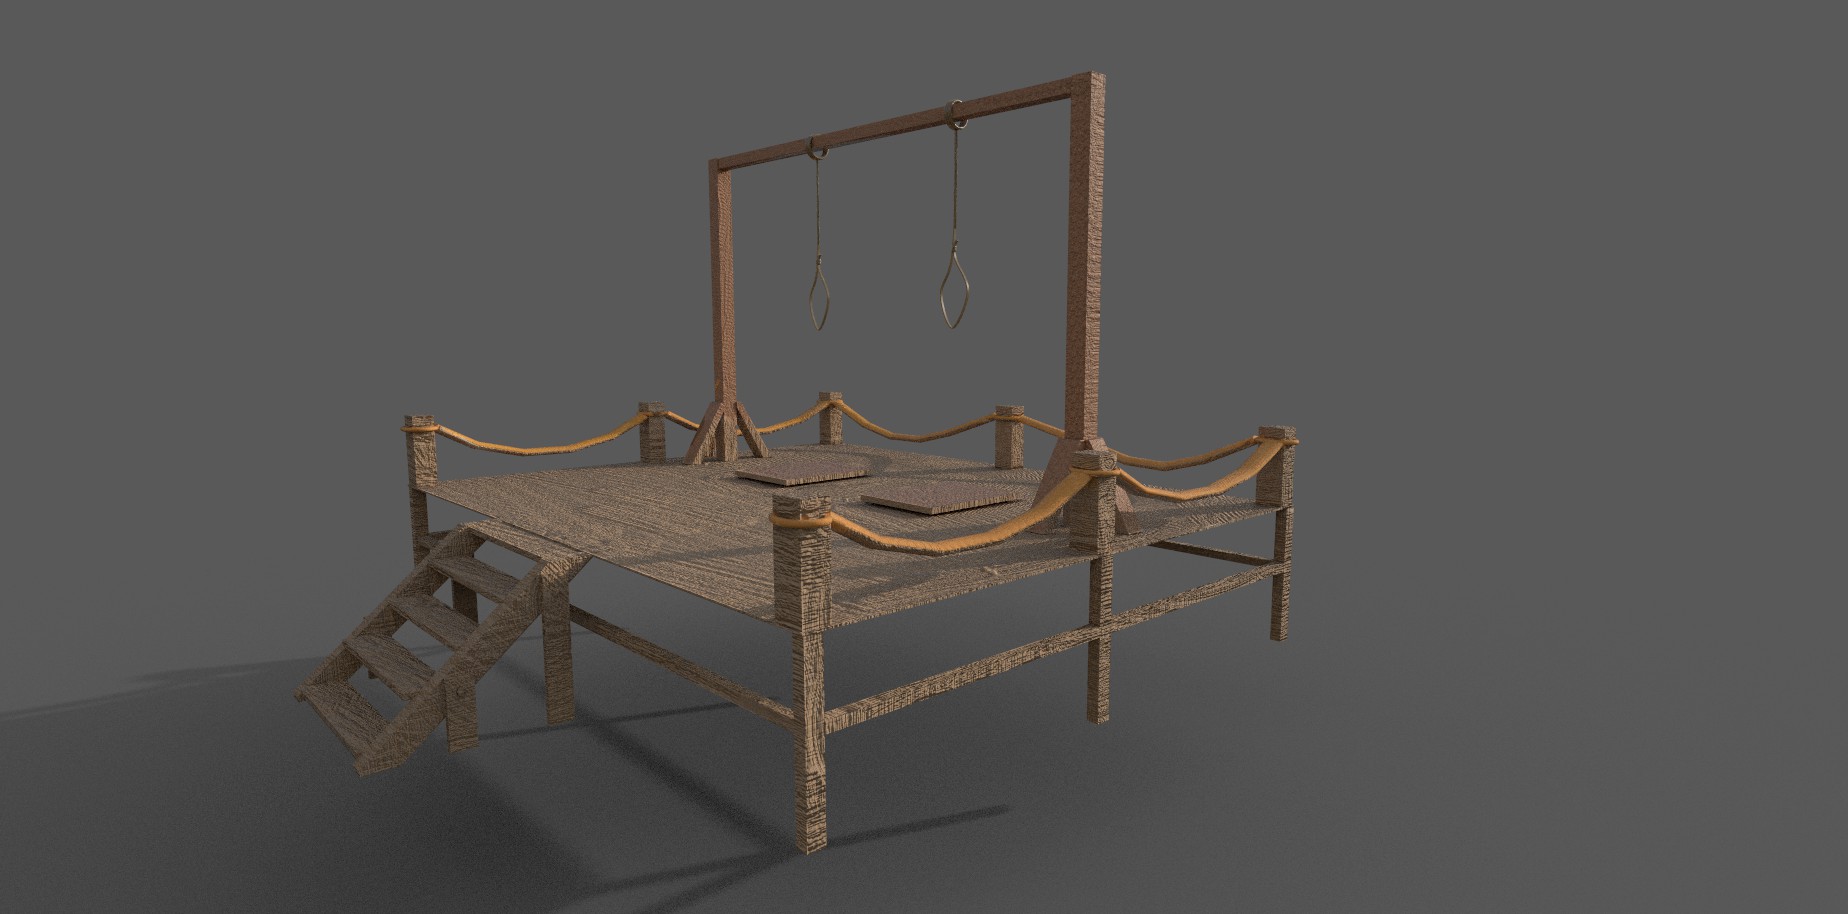
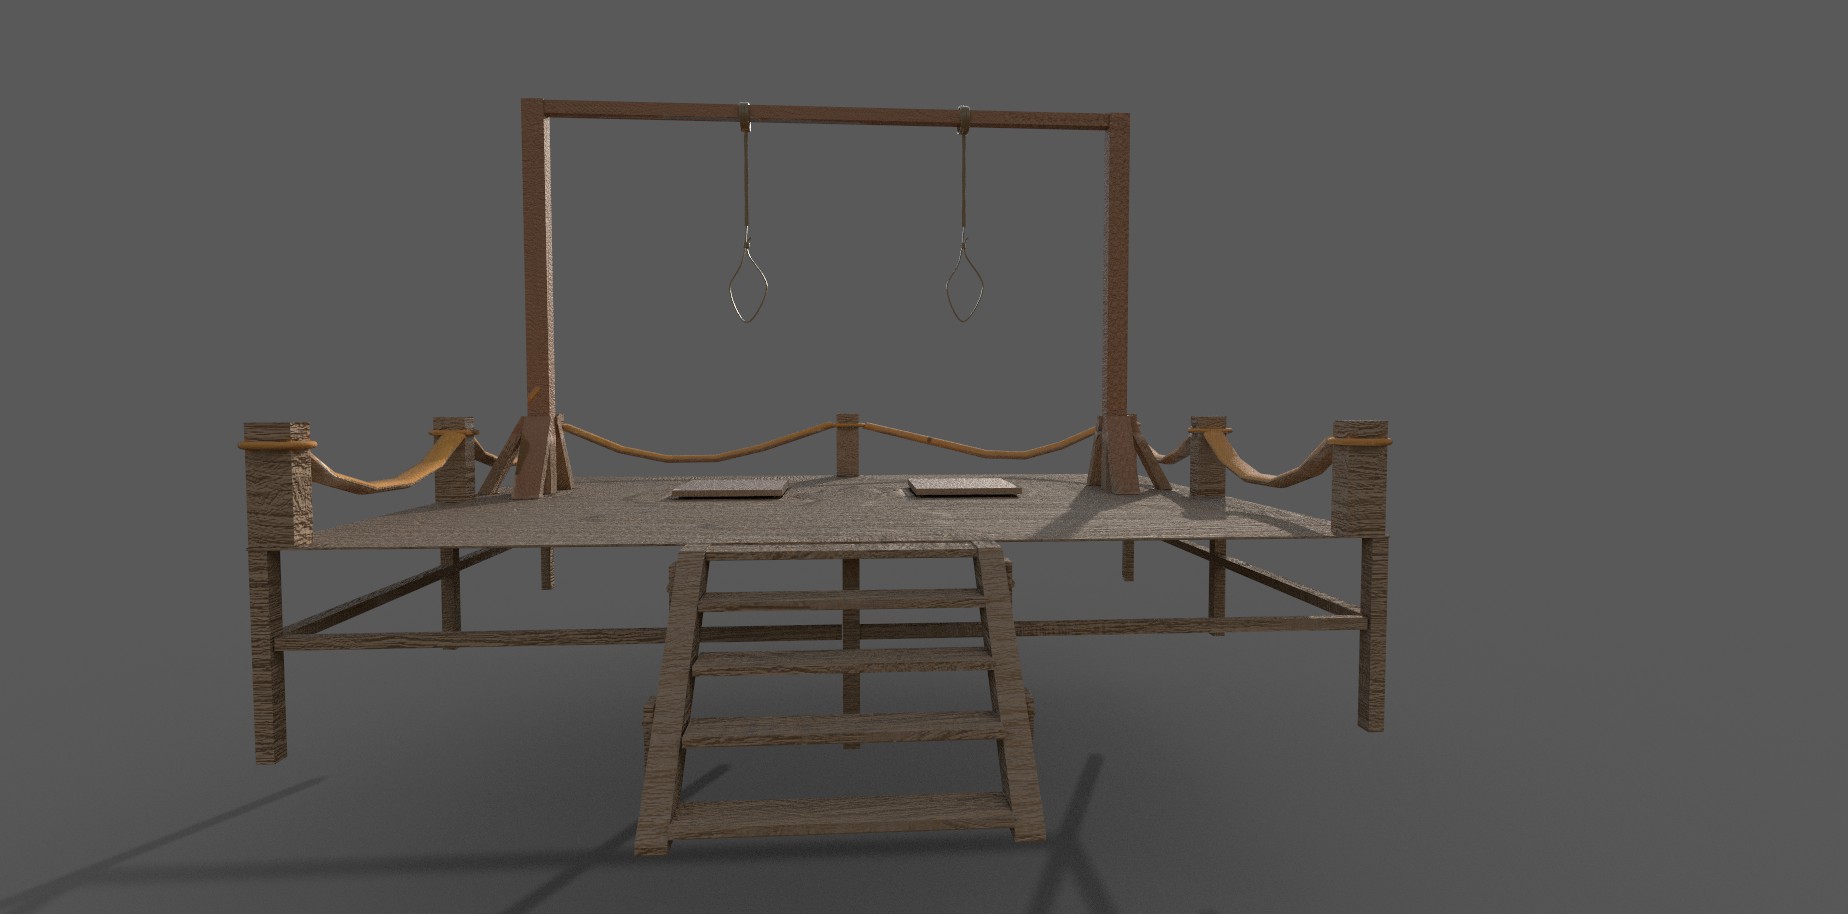
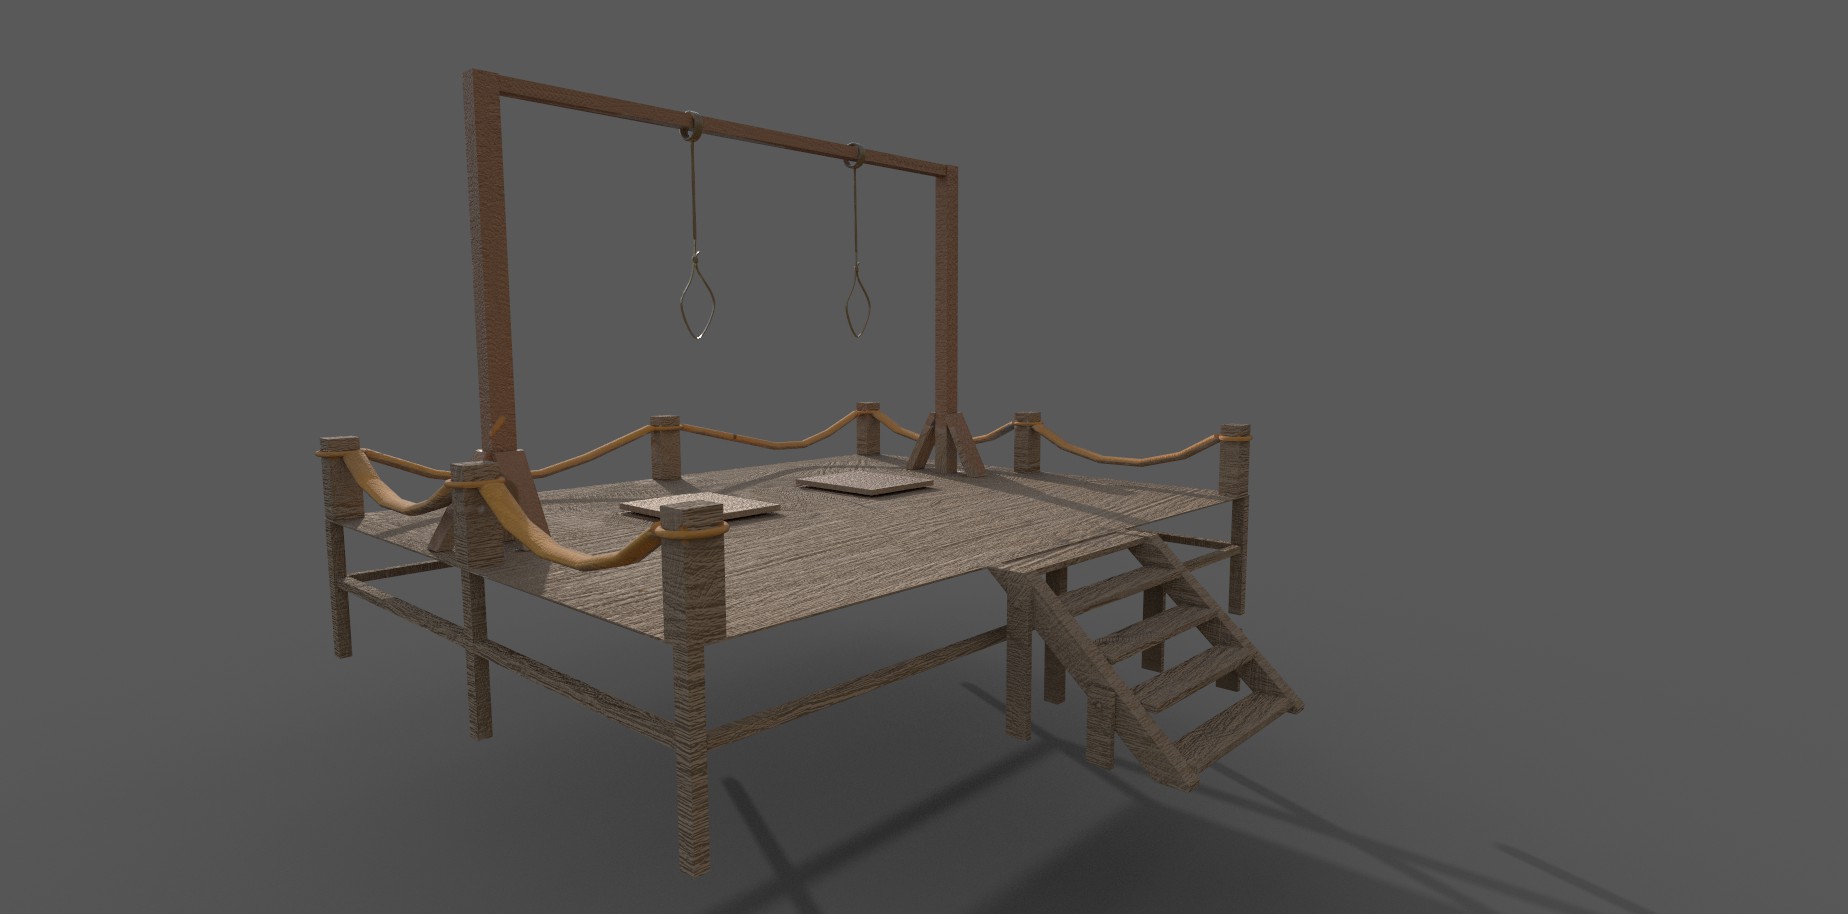
Medieval Gallows Scene Modelling Process
The progress of designing this model was very fun. I spent a good chunk of time researching different styLes that helped me with this asset. The first stage of development was thinking of ways of designing a rope. I thought about using the torus shape which can be used to tighten up shapes and it did look simikar to rope. while developing the rope it did not look quite right and it did lead me to work with the line tutorial which allowed me to create a rope and then convert it to a editable poly to then further develop this. This one of my extra models that I wanted to make and I was able to do a good job to capture a realistic asset.
Stage 1
Stage 2

Stage 3
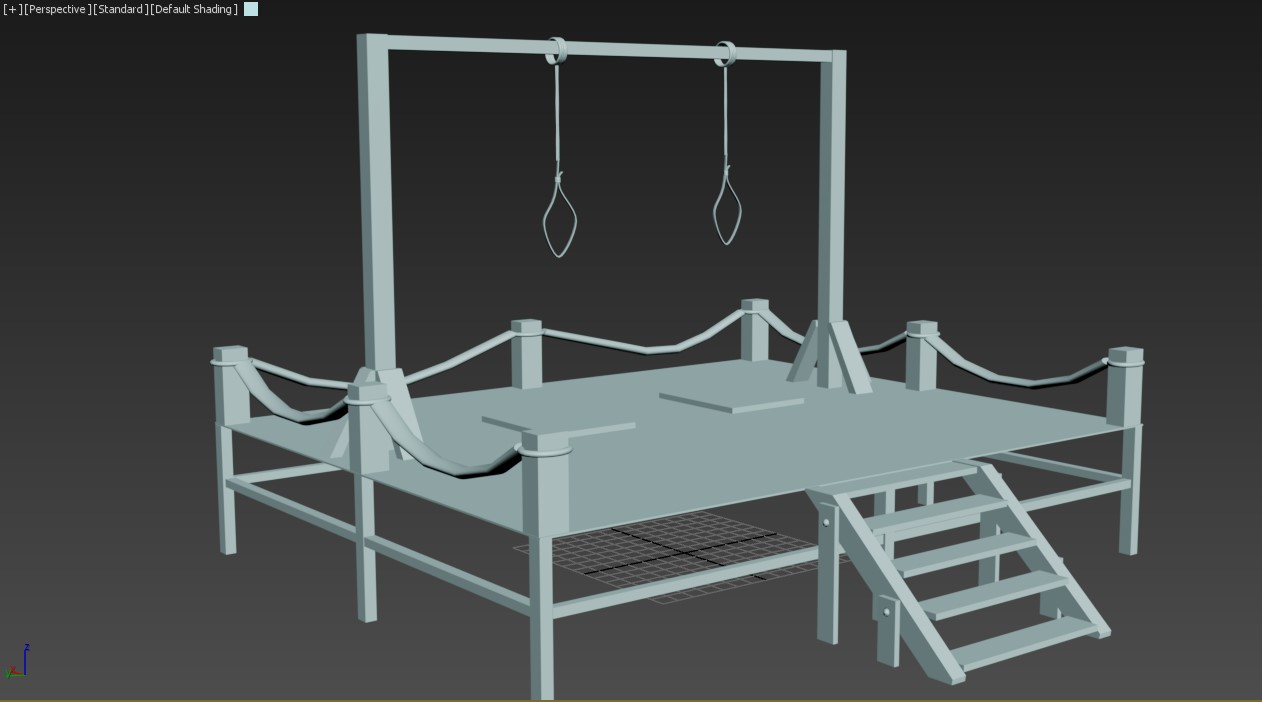
Medieval Gallows Final Renders
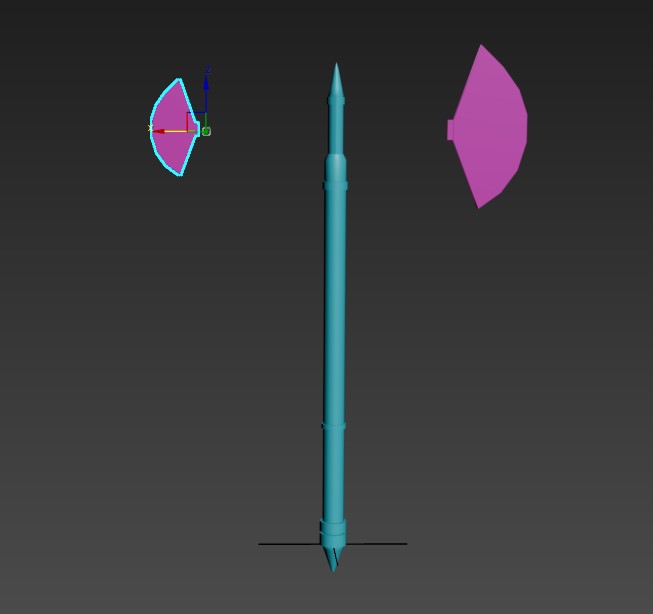
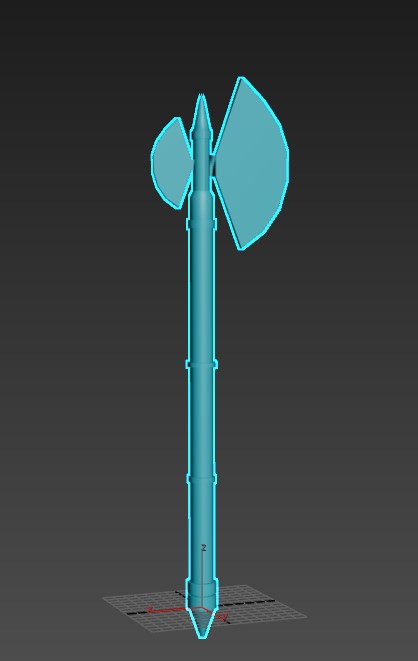
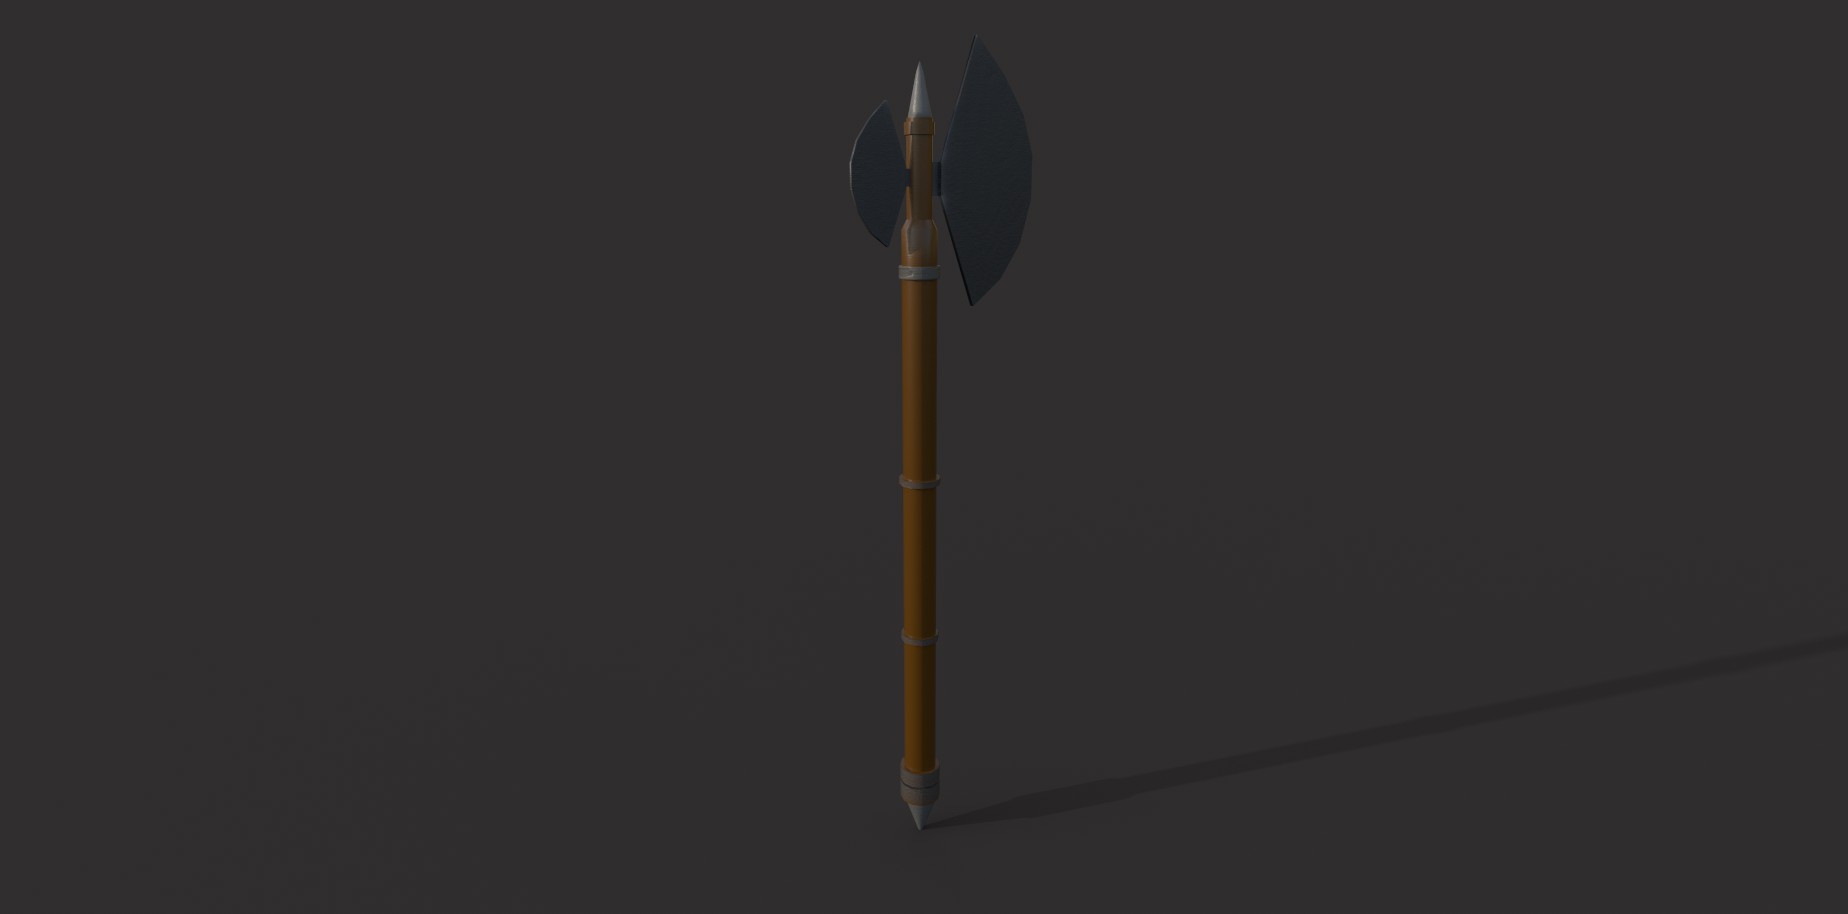
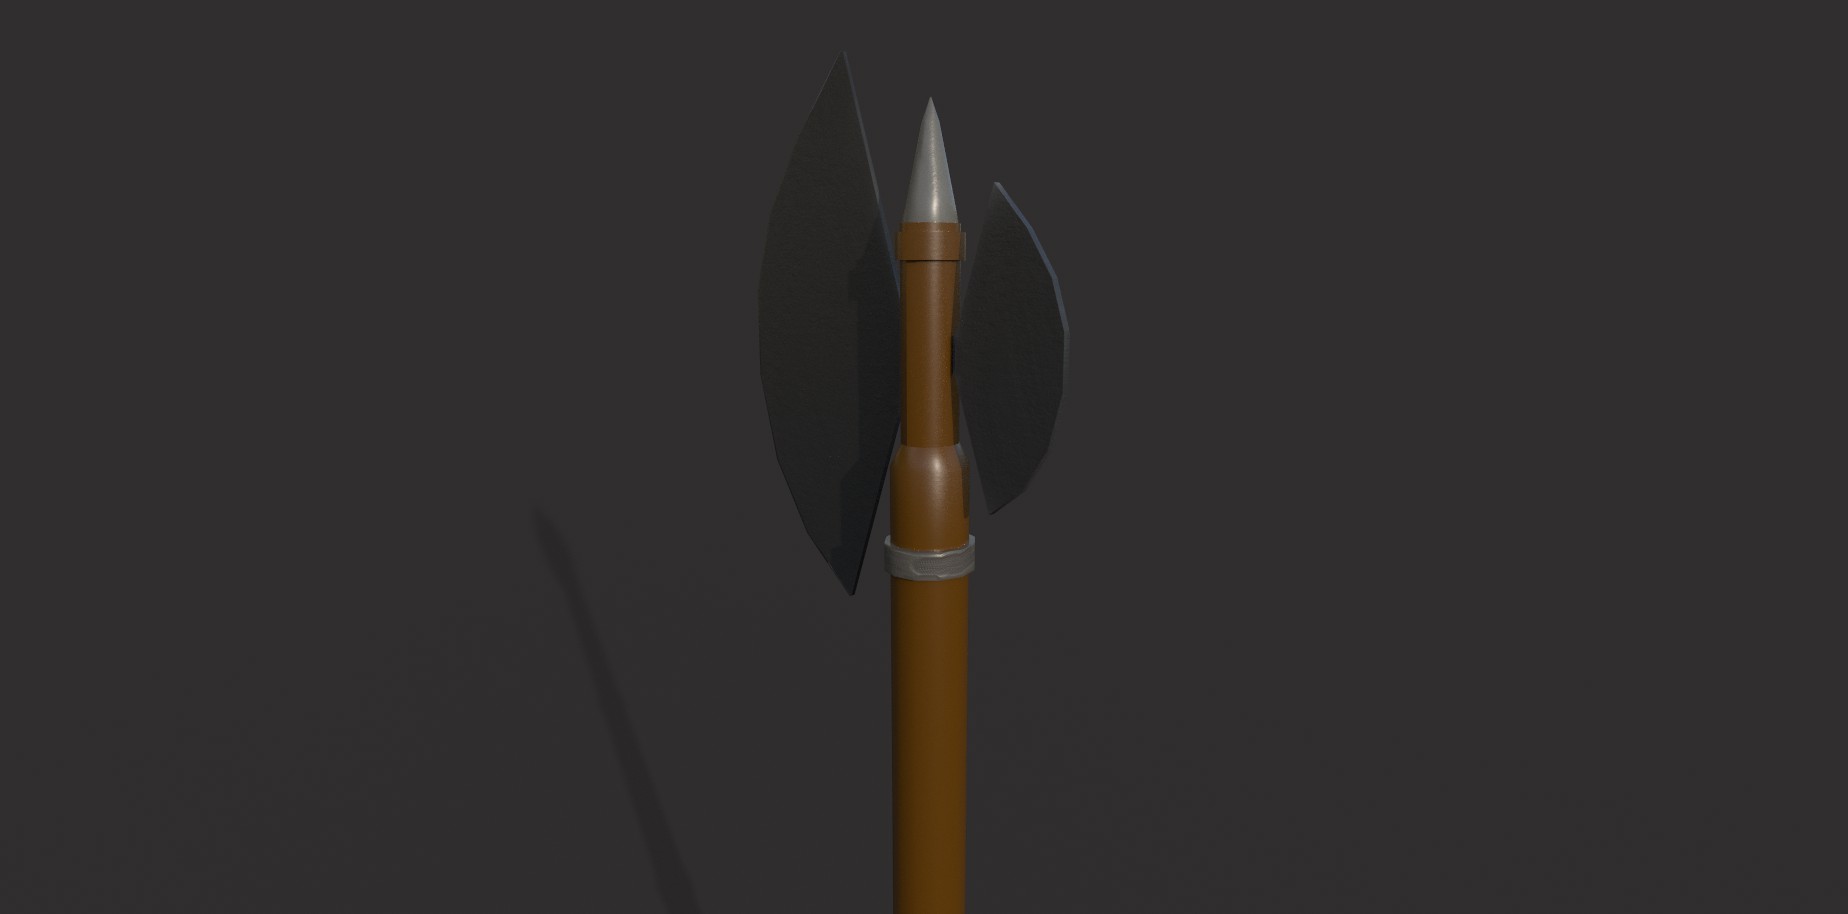
Medieval Axe
The final asset I wanted to make was a medieval two handed axe. This was designed as an asset that can be placed anywhere in the scene for example I had ideas to place the axe close to the castle or even near a blacksmith/Stall. The way this asset was designed involved researching different reference images and styles. For example during my development of the model I examined different parts like the size of the two blades or even having just the one blade. I opted to go for the main blade and then a smaller blade because It was the most common style in medieval England was this design.
Medieval Axe (textured)

How did I texture and render the models?
During the texturing process I noticed some overlapping polys which did effect my efforts to the texturing process. to fix this I began working on my uvs and was able to unwrap it as best as i could which was then supported by using the auto-wrap tool to fix the overlapping polys. The textures used involved different shades of wood which is realistic as from my research deepening on the wood supply that is what would be used. The final ideas I had was using different tools. Before i began rendering the assets to collect the screenshots I had to make sure the textures were baked so the textures look better.
The final stages I will talk about is what tools were used to texture the asset. I began with the basic paint tool and added a material to give the wood more substance and detail. While texturing I had to follow up with cleaning up the textures and not overlapping different areas of the asset. The other tool i used was the magic wand style tool which allowed me to texture faces rather than the entire polygon. It was perfect for texturing small assets like the torus around the ropes and posts. To render these assets I focused on finding the best angles of the assets to collect the screenshots and then present them in their best form.
Client Conversations and Feedback
below I have some screenshots of the feedback I received from the first presentation and the final outcome within the second presentation. During the first presenation we ran out of time before our group could present so I emailed the presentation to our client and lecturer thats when we received the feedback on the progress of the project. These were also helpful for improving our understanding of time management and we were able to vastly improve the second presentation. I believe the development of the presentation was very helpful to our overall vision of the project I began with fixing up the slide and putting any information within the speaker section so I could out more focus on the work and how I developed it for the presentation.
First presentation slide.

Second presentation slide.
Team work and structure
As a team we made sure to stay in contact and always speak to each other. As team leader I had the responsibility to speak to our client to keep track of any new developments with regards to the progress of the project. We set up a discord and began to correlate ideas and deadlines for the project. When we were given the project I made sure everyone was aware of deadlines and also what assets were needed to be made. everyone in the group spent time working through reference images and we then began working on the models required. The extra models that I made were designed to work alongside other models from other group members. For example I made a axe that would fit in the market that one of my peers was creating this allowed me to focus more on how I can develop my communication and technical skills to achieve this objective.
Thoughts on the project?
My overall thoughts of this project is that I very much so enjoyed th style and concept of it. I really enjoyed working with historical assets and then bringing them to life. As I was made team leader I made sure everyone was okay with the tasks and also spoke to our client to understand how these client projects work. I wanted to make more than one asset for the project and in the end decided on the East Gate, Axe and Gallows. The assets were fairly simple to make and as I disused in the different sections on these assets all had the opportunities to learn new skills. to summarise I believe the project was a success and everything that was completed I did to the best of my ability. within this project I was only required to make one model but I decided to work on more as I have a passion for history and based on my research I saw images of other heritage assets and wanted to design something else. This was also helpful to my own abilities as a 3d artist and I was able to learn new skills along the way. Below are all my references that I used to help me complete the project. I have linked 4 references that were used to model and the rest were research links and YouTube tutorials that helped enchance my knowledge of the 3d work and general knowledge to help me with the historical assets of the project. I always had a interest in history so this project very much suited me. While conducting the project I was also helping others with matching hhistorical accuracy in the models. i will finallly discuss the structure of how I conducted my work. while working on the planning and first presentation I did only plan to create one model but as I was enjoying the project I spoke to the client and decided to create more models that helped the environment. the overall view of this project is that I really enjoyed the concept and the process of working with clients. I will link all my handover files and refrences below.
Handover files (hub)
Below is a google drive link which should take you to a file that contains all my handover files which are assets and textures. the file is only viewable they cant be downloaded. I can put the setting on but these models will be viewable on other sites.
Click here to visit the handover files linkSketchFab (interactive models)
Sketchfab is a software that allows 3d artists to present their work. this site allows users to rotate and interact with the 3d models.
EastGate (SF)
Axe (SF)
Gallows(SF)
Catapult(SF)
Image References links
Click here to visit Catapult Reference Click here to visit Axe Reference Click here to visit East Gate Reference Click here to visit Gallows ReferenceResearch and Tutorial references links
Click here to visit Reference 1Author/JafarAbbas/date/22/12/2020
Click here to visit Reference 2Author/Mufasu CAD/date/04/11/2015
Click here to visit Refrence 3Author/AutoDesk/date/2012
Click here to visit Reference 4Author/N/A/date/2023/08/02
Click here to visit Reference 5Author/Badre Bousseta/date/Apr 19, 2023
Click here to visit Reference 6Author/N/A/date/01/06/2022
Click here to visit Reference 7Author/SidhnathCreation/Date/13/01/2023
Click here to visit Reference 8Author/British Express/date/N/A
Click here to visit Reference 9Author/Thomas Gregory/date/21/02/2023
Click here to visit Reference 10Author/Mutiple Modifiers/date/2022/11/16